Software
Install PaperCut
-
1
Download the student installer
While connected to Yale Secure, open the PaperCut software download page and download Student PaperCut – Mac.
-
2
Run the installer
Extract the downloaded ZIP folder, then open
printers_student.pkgand complete the installation.
macOS settings
Add the laser printer
-
3
Open Printers & Scanners
Open System Settings → Printers & Scanners, then select Add Printer, Scanner, or Fax…
-
4
Customize the toolbar
Hold the Control key while clicking the toolbar area to the right of the Windows icon, then select Customize Toolbar…
-
5
Add the Advanced control
Click and drag Advanced into the Add Printer toolbar next to Windows.
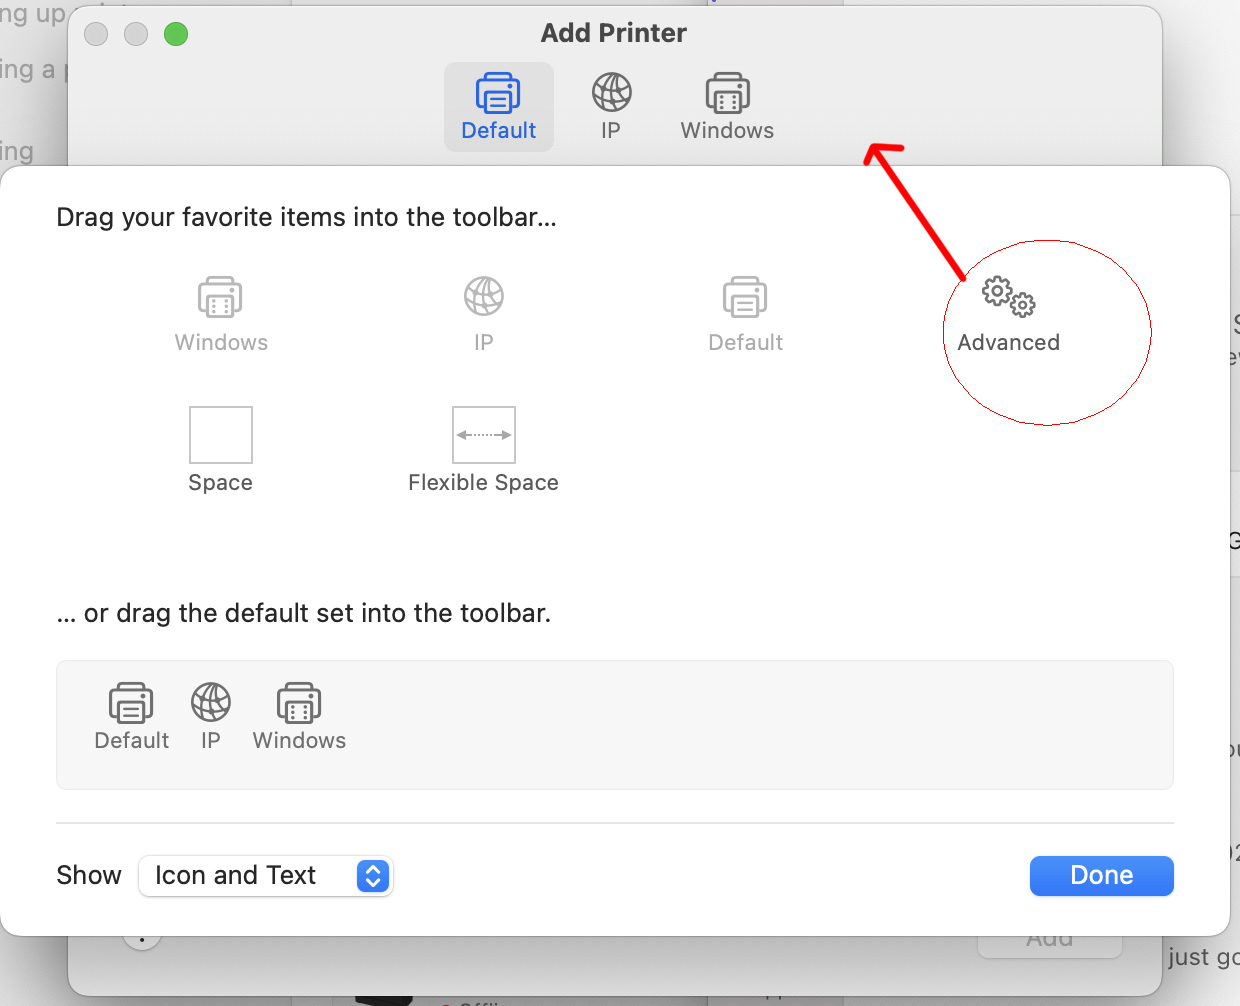
Drag the Advanced gear into the toolbar. -
6
Open Advanced
Select Done, then click the new Advanced toolbar option. It may take a moment to load.
-
7
Enter the printer address
Use these settings:
- Type
- Internet Printing Protocol (ipps)
- Device
- Another Device
- URL
-
8
Choose the Kyocera driver
Give the printer a recognizable name. Under Use, choose Select Software… and select the Kyocera 4054 driver.
Missing the driver? Download it from Kyocera →
-
9
Finish the setup
Select Add. When macOS asks about printer options, enable Cassette 3 and Cassette 4, then finish.
At print time
Send, authenticate, release
Send
Print to the newly added printer.
Sign in
Enter your Yale NetID and password when prompted.
Release
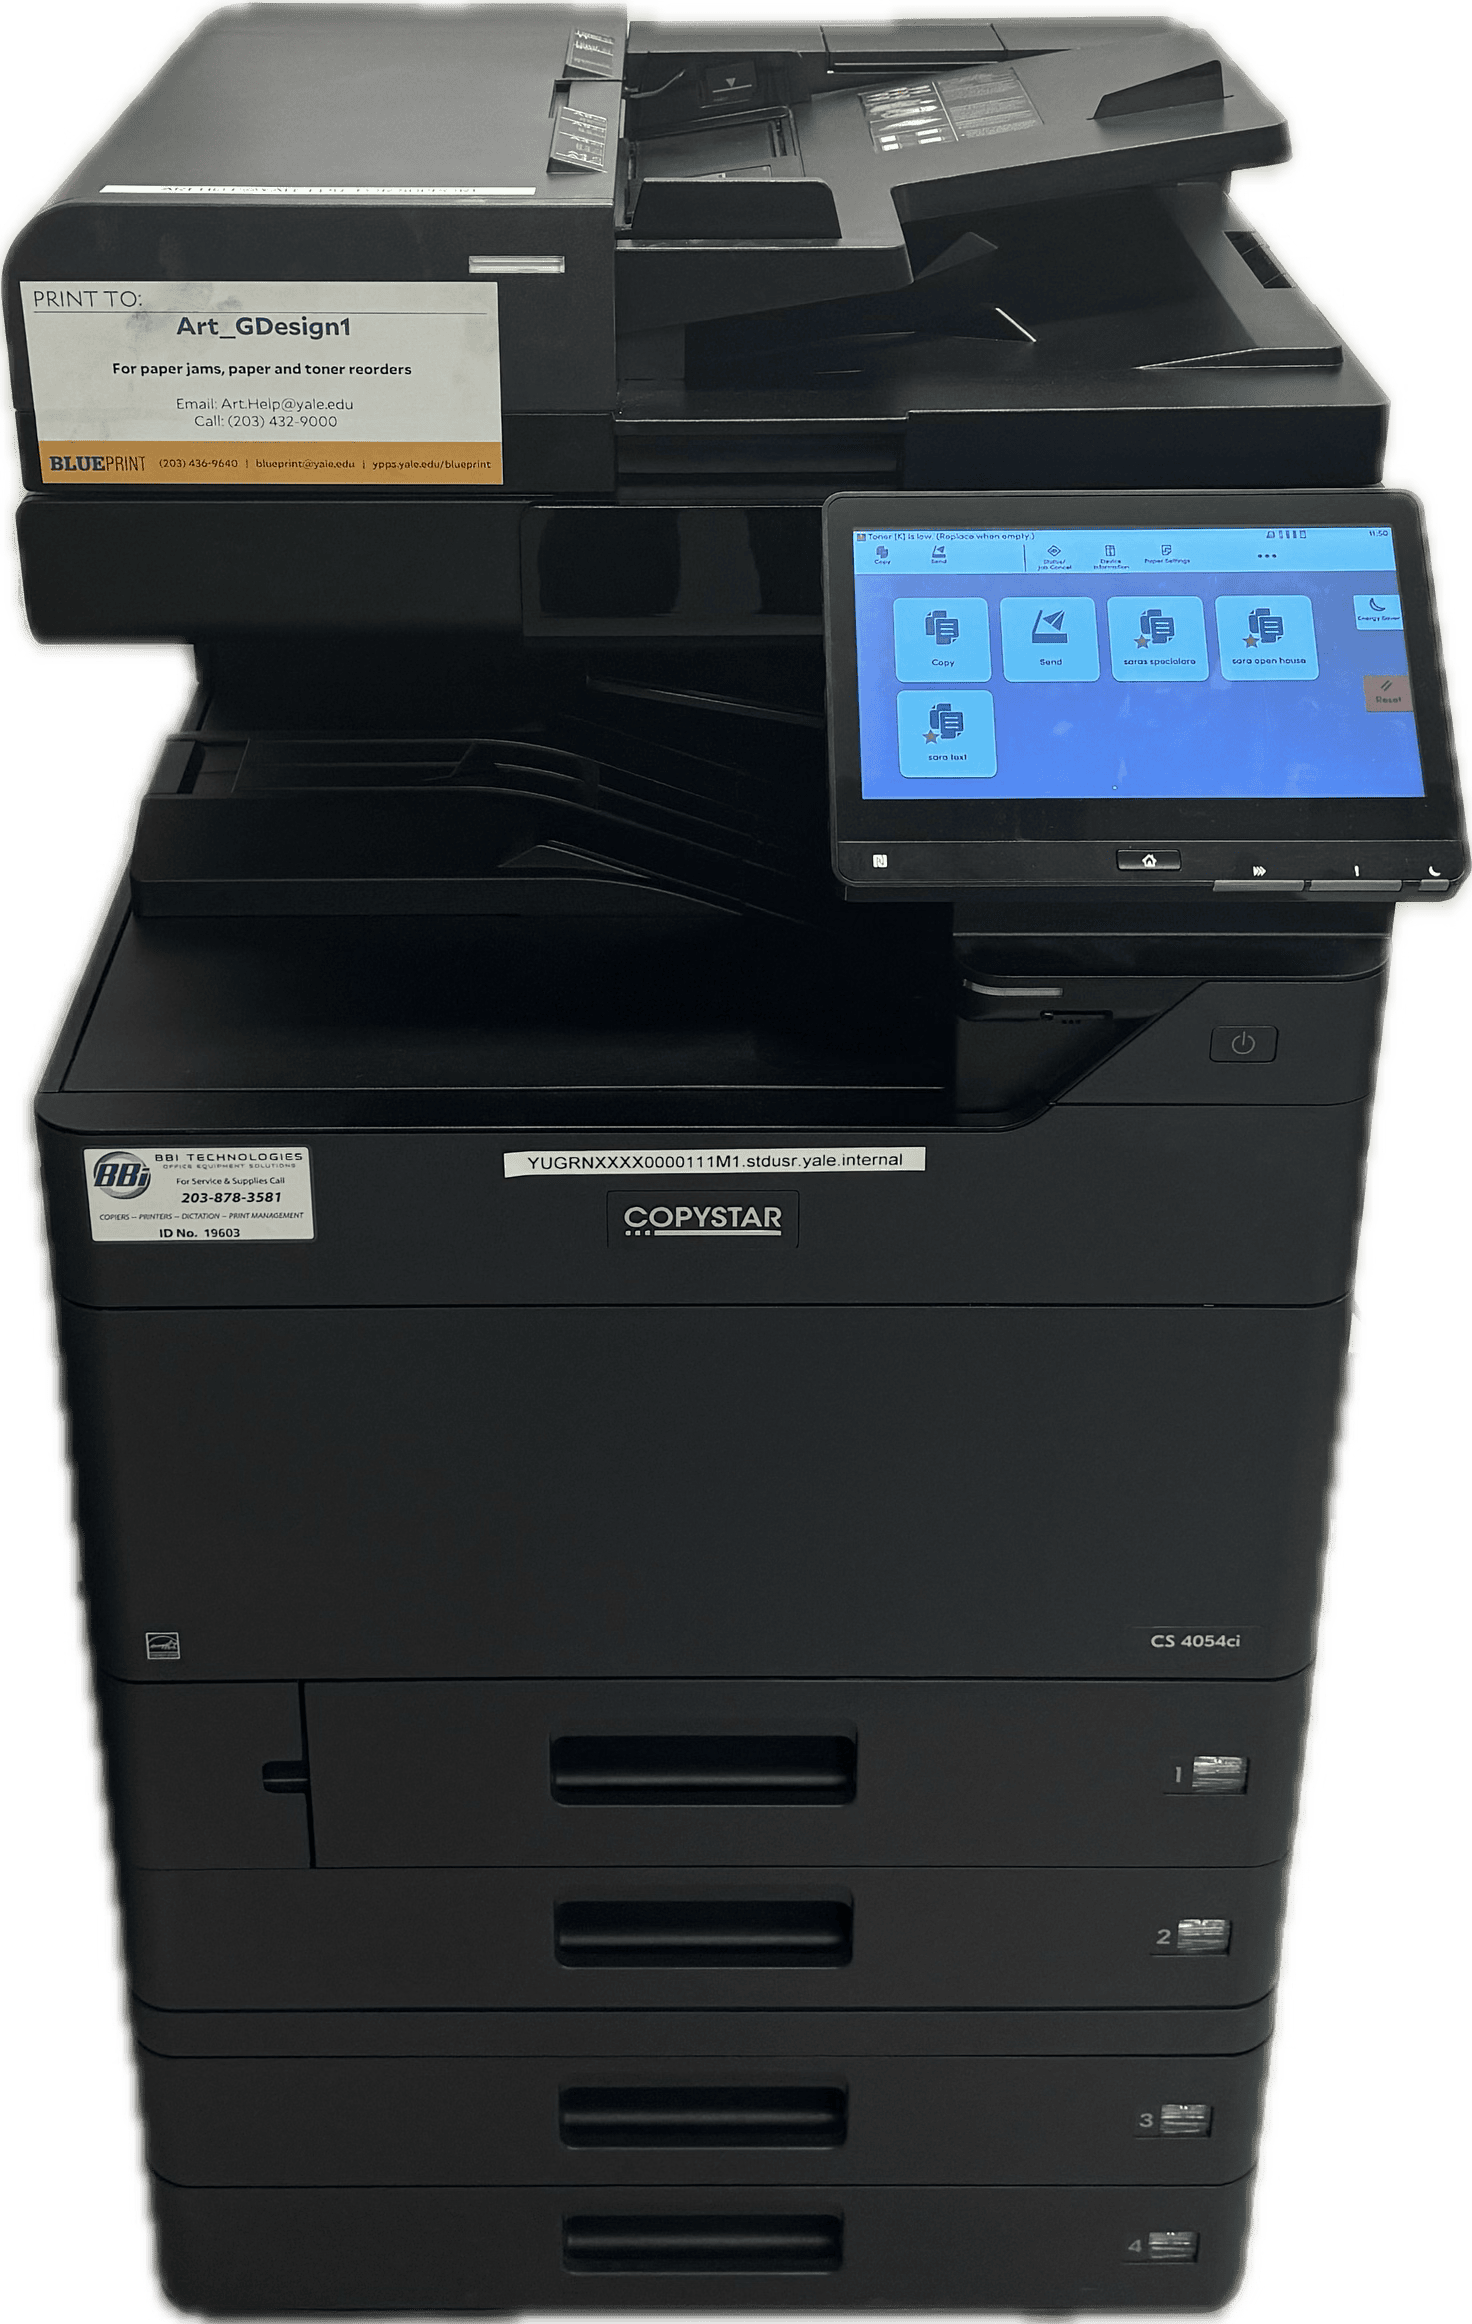
At the printer, scan your Yale ID and release the job.
Troubleshooting
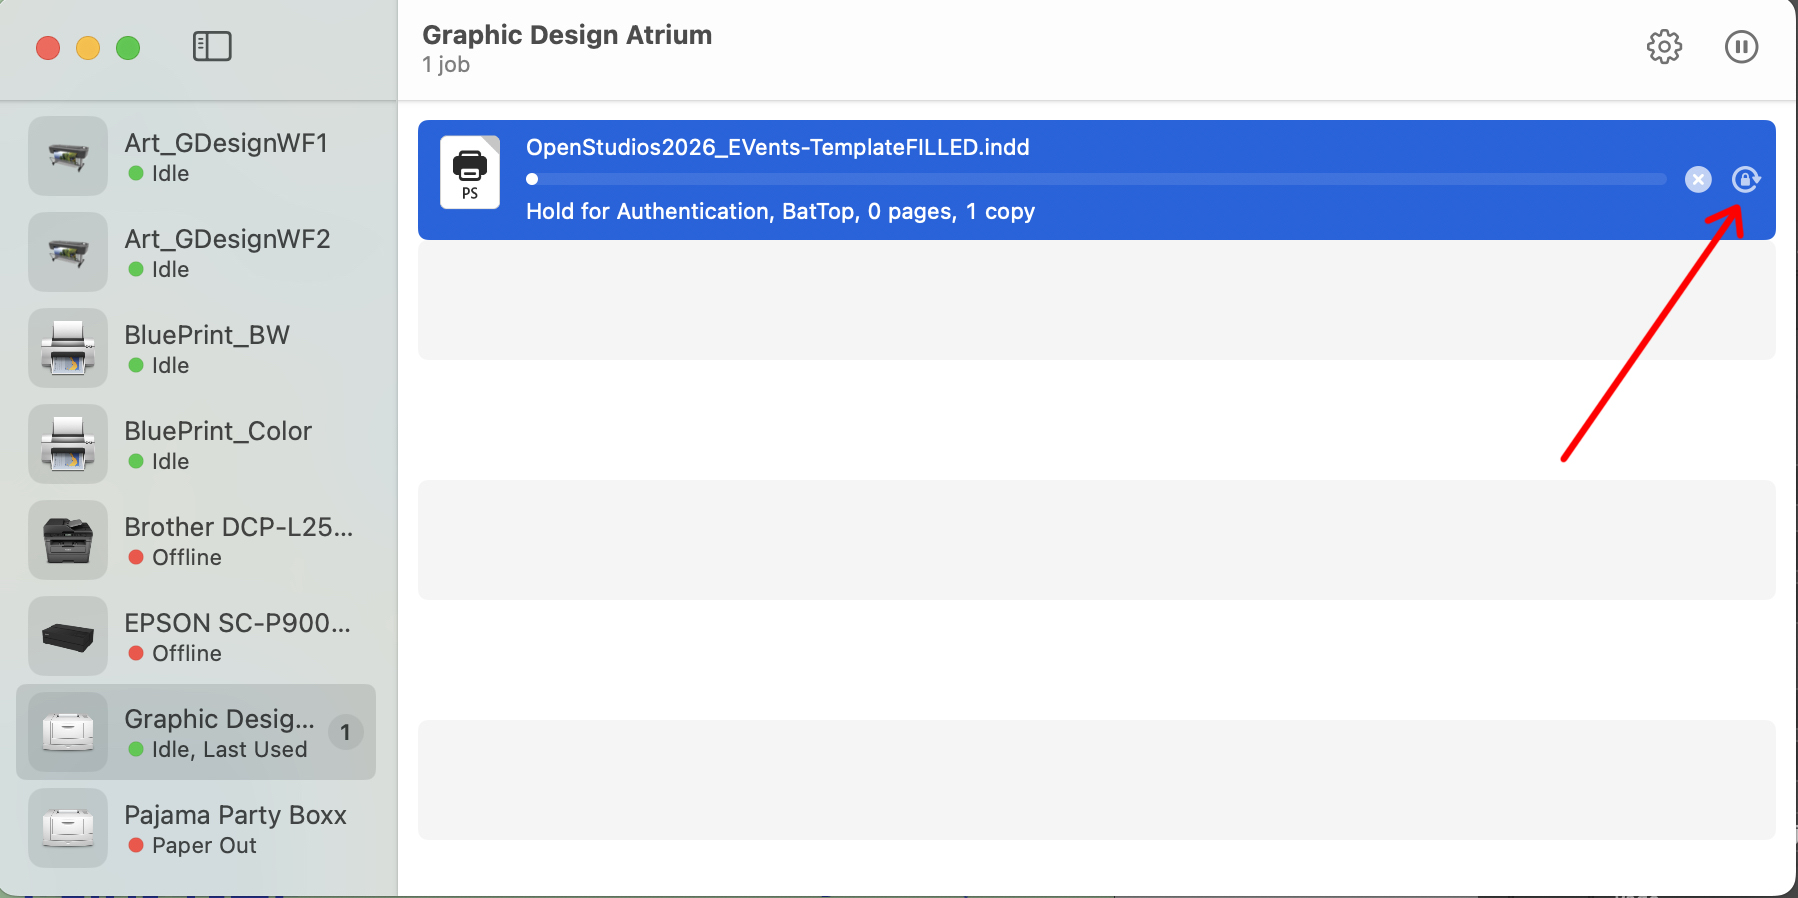
Is the job stuck on “Hold”?
Select the refresh icon at the far right of the print job, then enter your credentials again.